How I Edit My Instagram Photos

Here it is, the post all my lovely Instagram followers have been waiting for, how I edit my Instagram photos. There's nothing to it really! I almost always use my iPhone 6 to take my photos, unless I have done a new blog post where instead, I will download a photo from that post which has been taken with my Canon 1200D. But for images such as this, I just used my phone :)
Step 1
Taking the picture.
This is pretty straight forward to there's no need to talk you through this bit xD

Step 2
Adding a filter.
Only do this if you feel it needs one, I don't do anything to the photos taken with my Canon because the quality is amazing, but some photos taken with my iPhone can be a little dull so I add a filter. The one I use all the time is Valencia as it adds a nice golden, warm tinge to the photo which I adore :)

Step 3
Adding other edits to your photo.
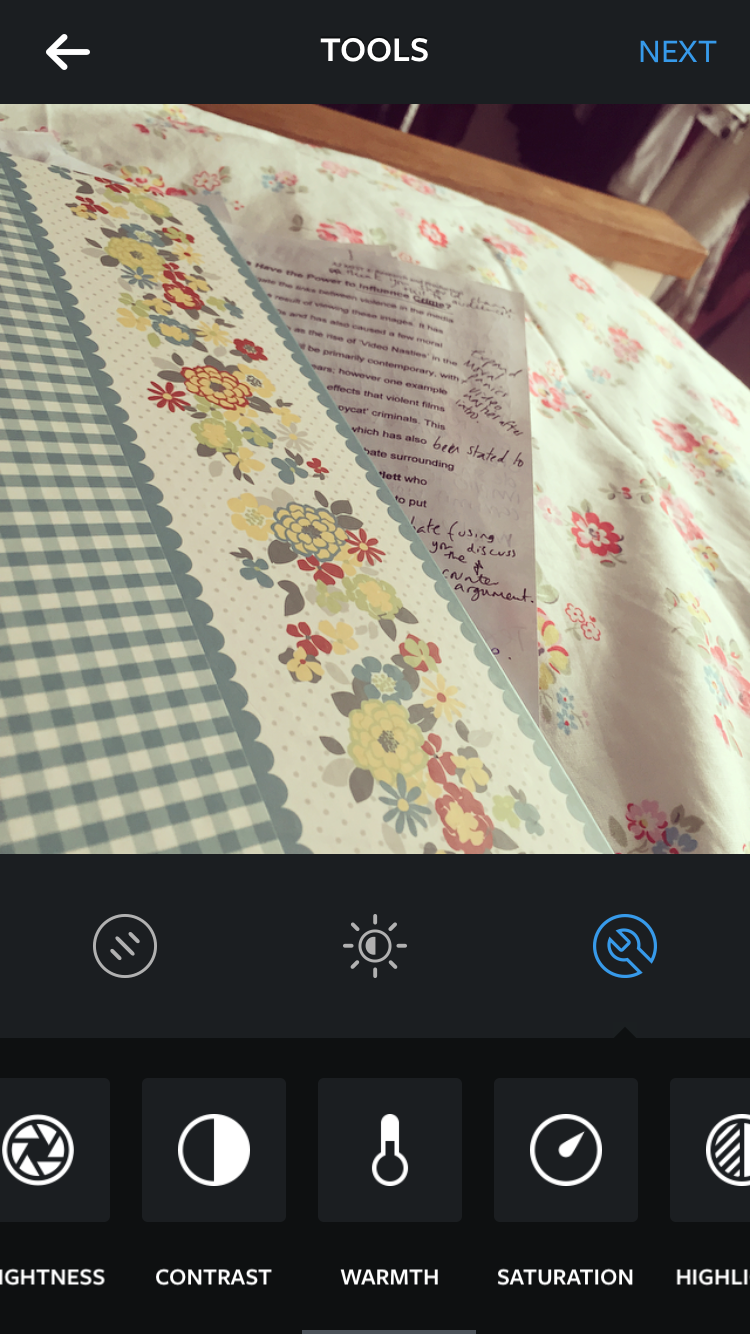
'Other edits' refers to brightening, or warming up (etc) your photo. To do this simply hit the spanner button and all the options will come up. Depending on how dark the photo is, I will brighten the photo AFTER I have added the filter.
However, I have not brightened this particular photo as I think it looks bright enough as it is. I almost always add warmth to the photo to make it look more cosy and less washed out. I might change the contrast slightly but not too much as I want the photo to look as real as possible.
But again, I haven't done it for this photo as I felt it wasn't needed. Also depending on how dark the photo is, I may sharpen the photo, it makes everything more defined, but I only change it a small amount to avoid it looking fake.


Step 4
Adding a caption, hashtags and emojis (if I feel like it ;) )
Once I'm happy with the photo, I will send it through the final stage which is publishing the photo, here I usually write a caption and add a few relevant hashtags, I have also been obsessed with using emojis recently so I end up adding a few of those as well xD
This is also where I choose whether or not to share the photo on other social media sites depending on the nature of the photo (which sounds dodgy but people on Facebook don't want to see photos of flowers or Cath Kidston everyday :) ).


Step 5
Hit 'Share'.
Obviously after all that I'm going to share it with you all, so once I share it with my followers, I just sit back and watch the love pour in! I also get satisfaction from seeing it in my gallery as well ;)


That's it from me today guys but I will see you again really soon :) let me know what your Instagram names are (using the links in the side bar or below) in the comments below and I will go and follow you :) Happy Instagramming ;) X
___________________________________________________________
WHERE TO FIND ME
DISCLAIMER
I have not
been paid or sponsored to write this specific blog post. All views and opinions
are my own. I am not affiliated with any companies that may be mentioned in
this blog post. All photographic content is my own. No Copyright infringement
intended.
*Blog post last updated on 10th February 2026


Do you watermark your photos on Instagram? I keep seeing people do that but I don't know how for my own photos. Lovely post!
ReplyDeleteI don't but I should! I have done in the past, but then I just got lazy, but I may start doing it again :) thanks for your lovely comment!
Delete