Making Mince Pies | Twelve Days of Christmas (Day 6)
Mince Pies are the ultimate festive treat, and as fun as they are to eat with a cup of tea while you watch 'Home Alone', its also tremendous fun to make them as well. There's something about homemade Mince Pies that beats shop bought ones each and every time. Personally, I find shop bought ones to be a tad dry, that and the pastry is more like shortcake sprinkled with caster sugar than a light fluffy pastry with a dusting of icing sugar. But when they're homemade, they're more juicy and flavoursome, with more of a citrusy taste, instead of the (sometimes) sickly taste of traditional mince meat. Nonetheless, these Mince Pies will satisfy your potential need for a festive comfort food, they also go brilliantly with clotted cream. Just one more thing before we get started, Mince Pies are better served warm (not hot) and should be received on a small plate, this is just a serving suggestion, so don't feel obliged to do this if you prefer to eat or serve them in a different way.
Lets get started shall we?
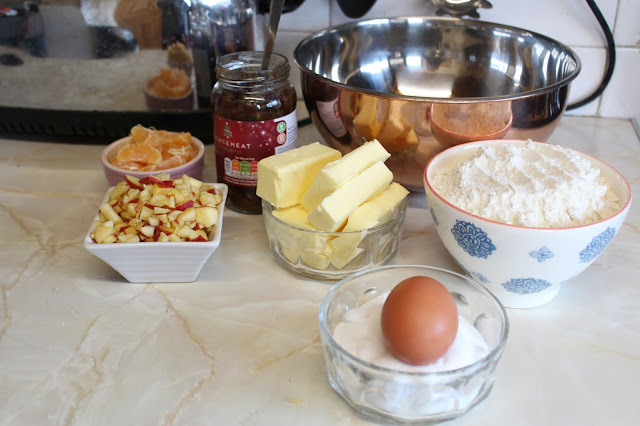
WHAT YOU WILL NEED
Ingredients
-A large jar of mince meat (approx. 600g)
-2 satsumas (segmented), ensure you have removed all pips
-1 apple (finely chopped)
-Zest of 1 lemon (optional)
-Splash of brandy (optional)
-Icing sugar (sieved for sprinkling afterwards)
For the pastry
-375g plain flour
-260g unsalted butter (softened at room temperature)
-125g caster sugar
-1 large egg
-1 medium egg
METHOD
Step 1...
Place the flour and butter in a bowl, and with your hands, mix them together until it becomes a crumb like consistency.
After this, pour in the sugar and crack in your large egg, then mix with a wooden spoon until the mixture stiffens, resembling a doughy texture. Then, lightly flour a clean, flat surface and tip the contents of the bowl out and roll the mixture into a large ball. You must then wrap it in cling film and place in the fridge for 10-15 minutes.
Step 2...
While the dough is chilling in the fridge, its time to make the mincemeat. Scoop all of the mincemeat out of the jar into the bowl you used to make the dough, then put the satsuma segments and chopped apple in also, and with the same wooden spoon, mix it all together. It doesn't matter if you squash some segments, if anything, it will add to the flavour of the mincemeat. This is also where you'll add the lemon zest and/or a splash of brandy if you chose to include these ingredients.
Step 3...
Preheat the oven to 220C/220 Degrees Fahrenheit/Gas Mark 7, then retrieve the dough from the fridge. Sprinkle a fresh a layer of flour on a flat surface and put the dough on there. Roll the dough out to approximately 3mm thick.
Then, grease a muffin tray with some butter and begin to cut out pastry with a circular cookie cutter, and place them in the tray.
Once the tray has been filled, grab a tea spoon and begin to fill the pastry in the tray. Once this has been done, crack the medium sized egg into a separate bowl and mix with a fork, then using a pastry brush, glaze the top of the pie (pastry edges only) with the beaten egg.
After this, reroll the pastry, you can then use which ever shaped cookie cutter you'd like to make the lids for your pies. I used a star, but you could use a Christmas tree, a snowman or a holly leaf cutter instead, or if you'd prefer a traditional Mince Pie, simply cut out some round lids.
Once you're satisfied with the shapes you've cut out, place them carefully on top of the pie and gently press the edges down to seal the contents of the pie in. Again, glaze the lid with some beaten egg.
Step 4...
Pop the pies in the oven at the same temperature you preheated it at and leave them to bake for 15-20 minutes. Once the time is up, check to see if they look golden brown, if so, take them out and let them cool down in the tray itself. Try not to attempt to take them out while they're still hot because they could simply fall apart. However, it would be preferable if you didn't let them cool completely.
Once you're happy to remove them from the tin, place them on a separate plate and sieve over some icing sugar, they're now ready to eat!
Enjoy!
MERRY CHRISTMAS!
________________________________________________________
WHERE TO FIND ME
PREVIOUS BLOG POST: 'The Christmas Tag'


Comments
Post a Comment